Family Member Care

How can we help?

Short, step-by-step guides for the things you'll do most.

Getting started

Family Member Care keeps everything about the person you look after in one place, and shares it with the family. Here is the shape of it.
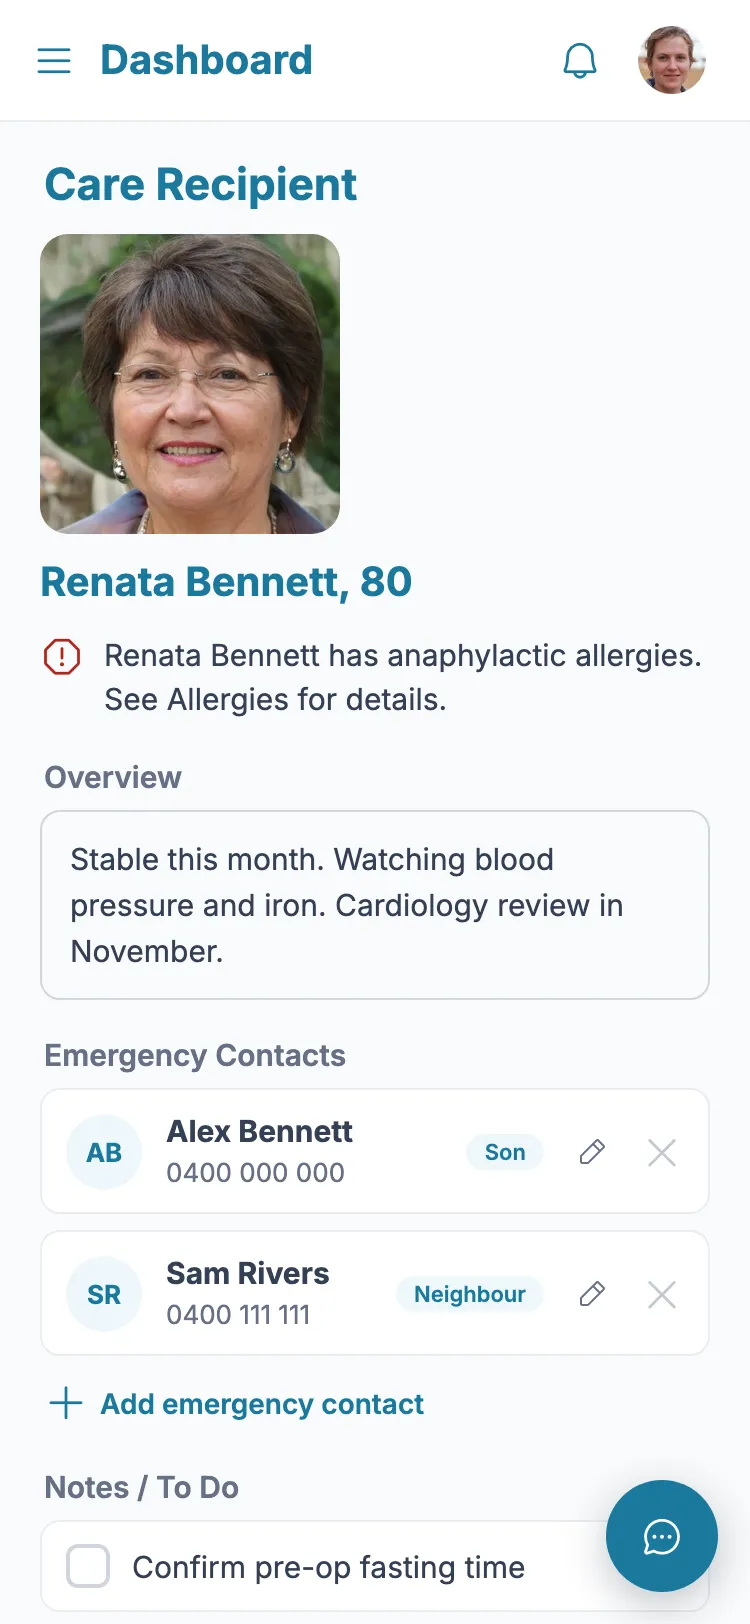
  1. 1 Your Dashboard shows the person you care for, an overview, their emergency contacts and anything on the to-do list.
  2. 2 The menu (top-left) opens each kind of record: diagnoses and medications, practitioners, allergies, referrals, test results, appointments and documents.
  3. 3 Add a record with the "Add" button on its screen, or the coloured Quick add buttons on the Dashboard.
  4. 4 Invite the rest of the family so everyone sees the same up-to-date picture.
  5. 5 You start with a 7-day free trial - full access, no card needed.
Getting started screenshot

You're set up when

  • You can see the person you care for on the Dashboard
  • You know where each kind of record lives
  • You have invited anyone who helps

Create an account and start your free trial

Anyone in the family can start an account. The first person becomes the group admin and invites the rest.

  1. 1 On the login screen, tap "Create an account".
  2. 2 Enter your name, email and a password.
  3. 3 You start on a 7-day free trial with full access - no card needed.
  4. 4 Add the person you care for, then invite the rest of the family.
  5. 5 When you are ready, choose a plan, or enter a provider activation code if you have one.

Subscriptions and billing

After the 7-day trial, Family Member Care continues on a subscription. You can change or cancel any time.

  1. 1 Plans are Standard or Premium, billed monthly or annually. The price is shown in the app in your local currency.
  2. 2 On the web, payment is by card, handled securely by Stripe. On iPhone or iPad it is billed through your Apple ID; on Android through Google Play.
  3. 3 Manage your subscription in Settings, or in your Apple ID / Google Play settings on a phone.
  4. 4 To cancel, do it before your next renewal - you keep access until the period ends.
  5. 5 A provider activation code can cover your subscription instead - see "Provider activation codes".

Tip: Your records are never deleted if a subscription lapses - you just cannot edit until it is active again.

Provider activation codes

Some NDIS and aged-care providers cover Family Member Care for the families they support, using an activation code.

  1. 1 If your provider sent an activation link, open it on your device - it applies the code to your account.
  2. 2 Otherwise, enter the code in the app when it asks for one.
  3. 3 Once applied, your subscription is covered for as long as the code is valid - no card needed.
  4. 4 If a code will not work (not recognised, already used, or expired), check you typed it exactly, then contact your provider. You can also tap "Ask for help" and we will sort it out.

Invite or remove a caregiver

Everyone in the care group sees the same records, so care stays coordinated.

  1. 1 Go to Settings.
  2. 2 Under "Care Group", tap "Invite caregiver" and share access.
  3. 3 To remove someone (group admins only), find them in the Caregivers list and tap the ✕ beside their name.
  4. 4 Confirm - they lose access straight away.

Set your profile photo

Your photo appears top-right and beside your name in the care group.

  1. 1 Go to Settings.
  2. 2 Under "Your Profile", tap "Change photo".
  3. 3 Choose a picture from your device.
  4. 4 Tap "Save profile".

Review records we brought across

If your records were moved from another system, a few need a quick check.

  1. 1 On your dashboard, tap the "records need a review" banner (or go to Settings → Review records).
  2. 2 For each item, confirm or correct the date or dose.
  3. 3 Tap "Save & next" to keep it, "Do later" to come back to it, or "Ignore" to dismiss it.
  4. 4 Anything you leave for later is waiting in Settings → Review records.

Add a diagnosis and its medication

Diagnoses and their medications live together, so everything about a condition is in one place.
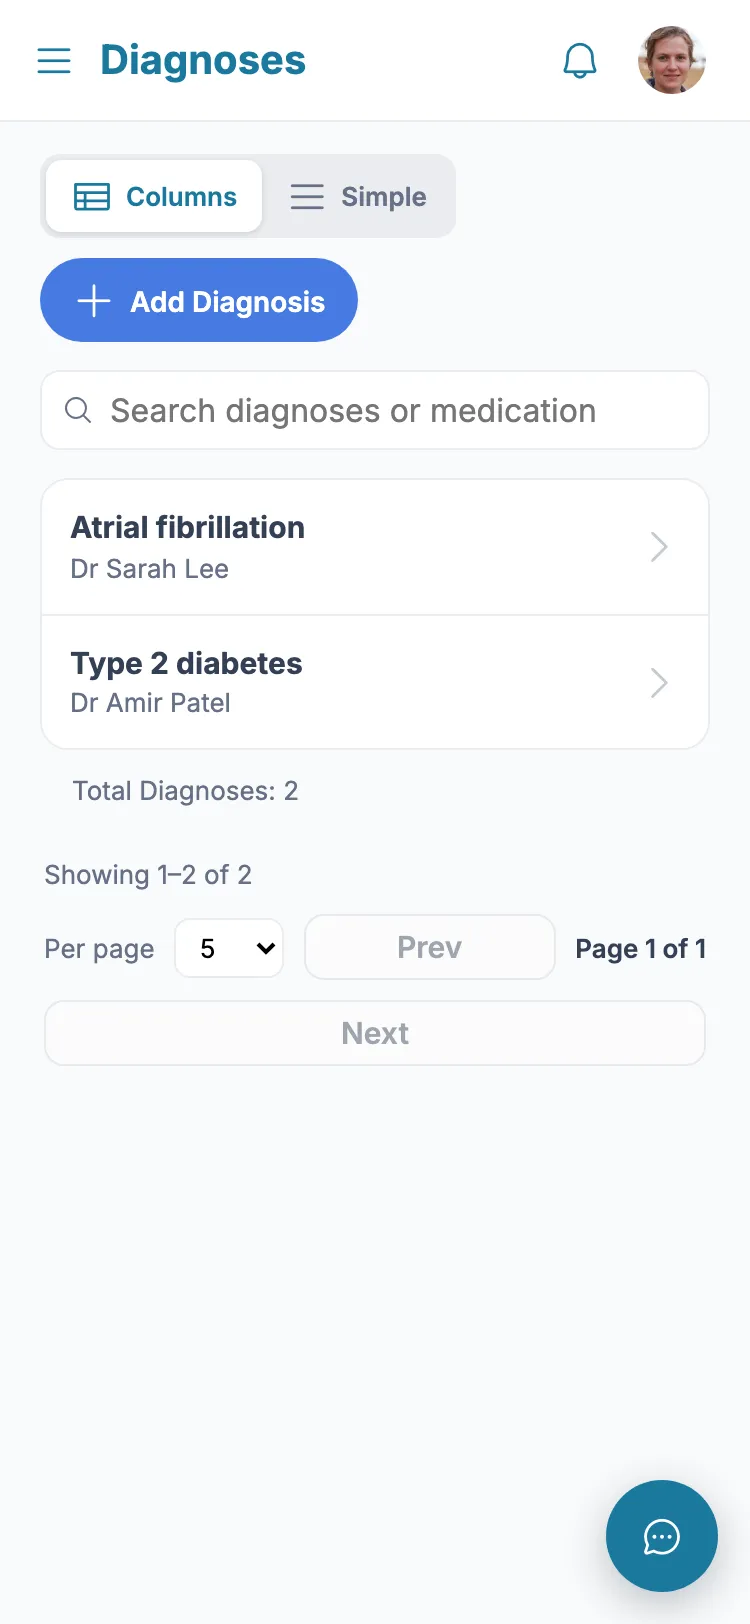
  1. 1 From the menu, tap "Diagnoses/Medication".
  2. 2 Tap "Add Diagnosis".
  3. 3 Enter the diagnosis name and, if you know it, the date it was diagnosed.
  4. 4 Optionally choose the treating practitioner from the list.
  5. 5 Tap Save.
  6. 6 To add a medicine, open the diagnosis and tap "Add medication".
  7. 7 Enter the medicine name and dose. Leave "Still being taken" ticked, or untick it if it has stopped.
  8. 8 Tap Save.
Add a diagnosis and its medication screenshot

Tip: Medicines that have stopped stay on the record but show as struck-through, so you keep the history.

Add a practitioner

Practitioners you save here can be linked to diagnoses, appointments, referrals and test results.
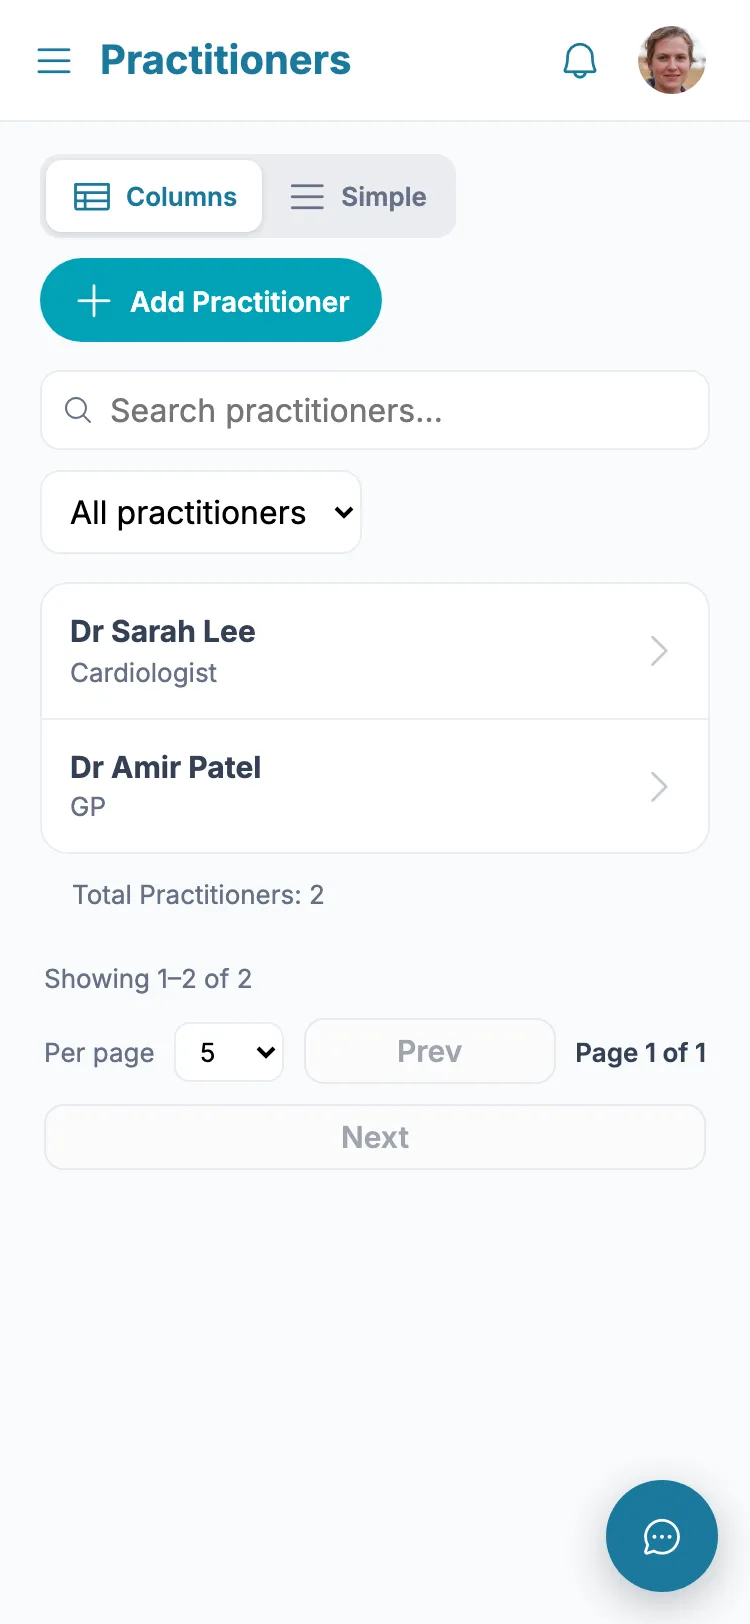
  1. 1 From the menu, tap "Practitioners".
  2. 2 Tap "Add Practitioner".
  3. 3 Enter their name, specialty, clinic, phone and email.
  4. 4 Tap Save.
Add a practitioner screenshot

Tip: If you stop seeing a practitioner, open their card and switch the toggle to Inactive - they are hidden from new pickers but stay on past records.

Add an allergy

Allergies show prominently so anyone helping can see them quickly.
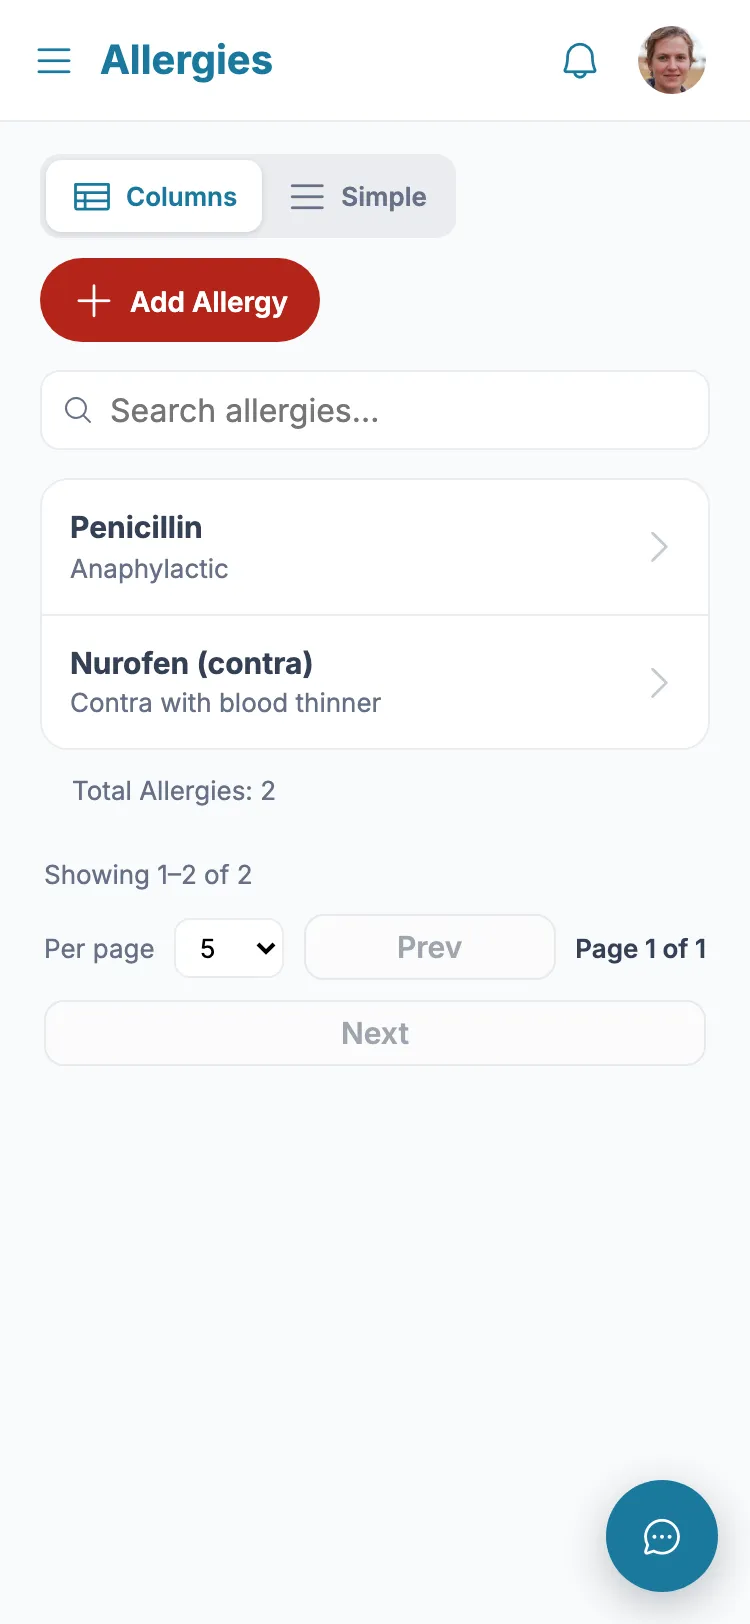
  1. 1 From the menu, tap "Allergies".
  2. 2 Tap "Add Allergy".
  3. 3 Enter what the person is allergic to.
  4. 4 If it can cause anaphylaxis, mark it - a warning will show on the dashboard.
  5. 5 Add any notes, then tap Save.
Add an allergy screenshot

Record a test result or referral (with a file)

You can attach the original document (a scan, PDF or photo) so it is always to hand.

  1. 1 From the menu, tap "Test/Test Results" (or "Referrals").
  2. 2 Tap Add.
  3. 3 Fill in the details and who ordered or gave the referral.
  4. 4 Tap "Attach" and choose the file.
  5. 5 Tap Save.
  6. 6 To open the file later, tap "View" - it opens a preview you can also download.

Add an appointment and assign a carer

Assigning a carer sends them the details and a calendar invite, so the right person is there.
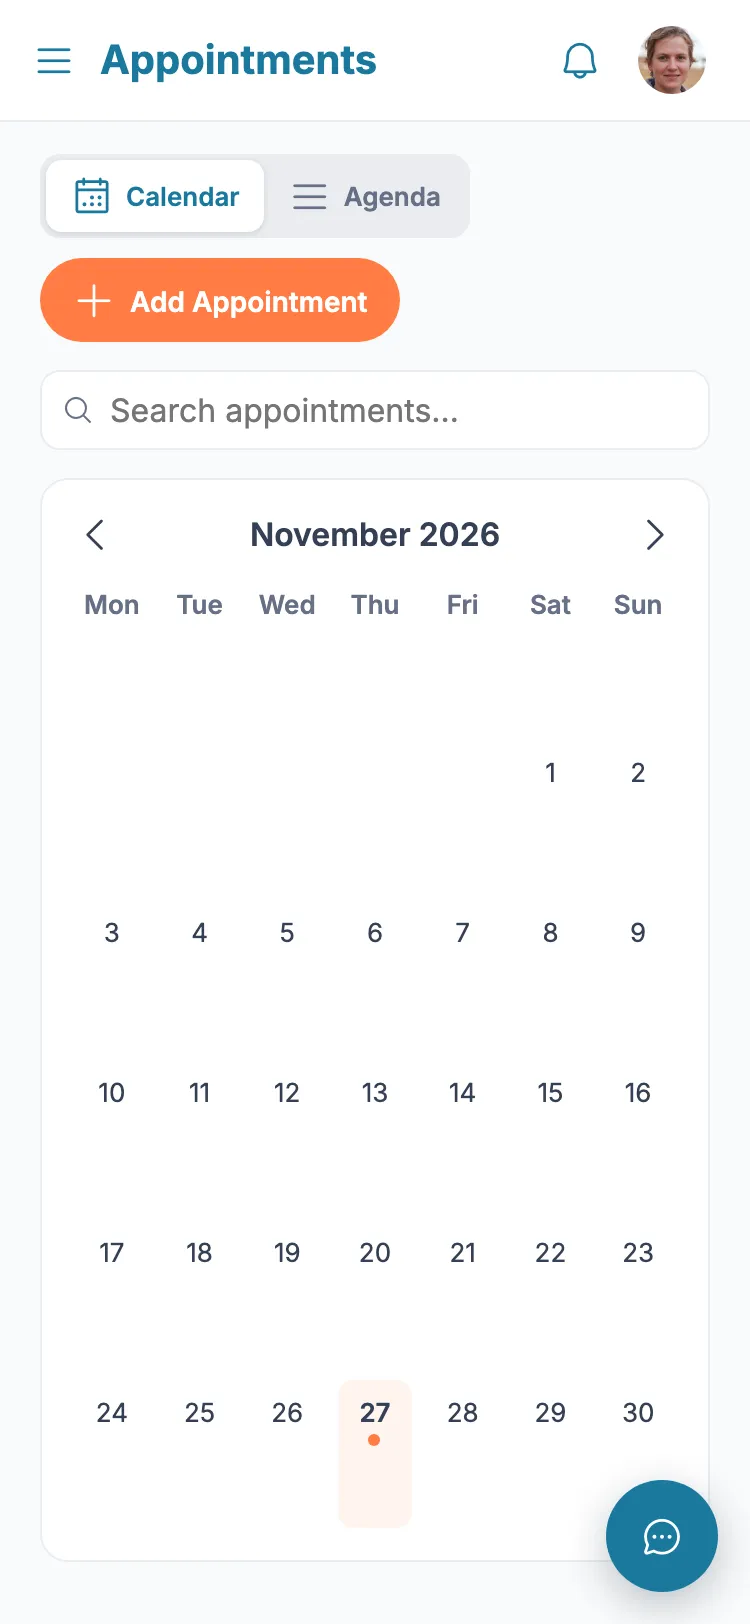
  1. 1 From the menu, tap "Appointments".
  2. 2 Tap Add.
  3. 3 Set the date, start and end time, and the event name.
  4. 4 Optionally choose the practitioner.
  5. 5 Under "Assign to a carer", pick a family member to make responsible.
  6. 6 Tap Save.
Add an appointment and assign a carer screenshot

Tip: The assigned carer gets a notification, an email, and a calendar invite they can add to their own calendar.

Store and view documents

Documents are shared with your whole care group, and every change is recorded.

  1. 1 From the menu, tap "Documents".
  2. 2 Tap "New folder" and give it a name.
  3. 3 Open the folder and tap "Add document" to upload a file.
  4. 4 Supported files: PDF, images, Word, Excel and text, up to 25 MB.
  5. 5 Tap a document to view or download it. Use the pencil to rename, or the bin to delete.

Export a summary as a PDF

A single document with the key information, handy for appointments.

  1. 1 Go to the Dashboard.
  2. 2 Tap "Download PDF".
  3. 3 A summary of diagnoses, medications, practitioners and more is created for you to share or print.

Notifications

The bell keeps you up to date without having to check every screen.

  1. 1 Tap the bell (top right).
  2. 2 You are notified when a message arrives, you are assigned to an appointment, or another carer adds new information.
  3. 3 Tap a notification to jump straight to it.

Ask the Family Member Care assistant

Type your question in plain English and get a step-by-step answer from these guides – never medical advice.

Assistant coming soon